Getting started with SnapTest
This guide will give you the first steps to learn how to use SnapTest tools. Before you start, download the SnapTest Chrome Extension and register an account.
Step 1: Do the in-extension tutorial
After registering, proceed with the in-extension tutorial which will help you create and run your first test.
Step 2: Prepare to generate your first QA project.
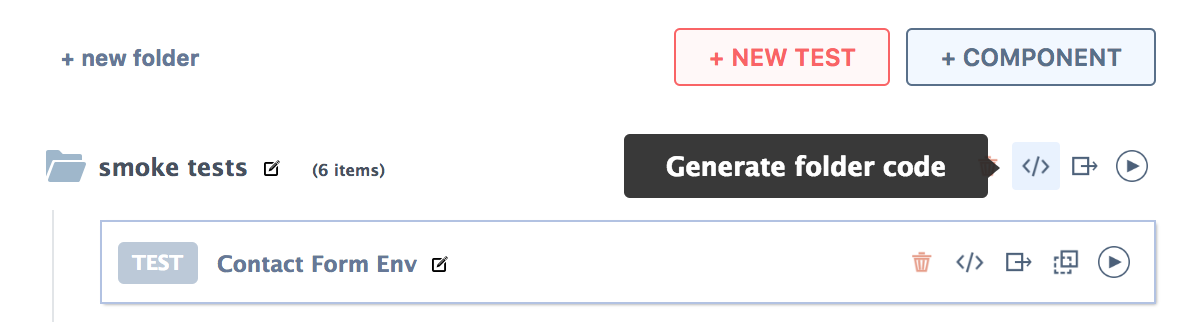
You now have an account full of tests, don't worry, you can clean it up whenever you'd like. But before you do, let's generate the "Sample Tests" folder which came with your new account using the SnapTest's official NightwatchJS generator. Our goal is to set up and entire QA project on your local machine.
SnapTest usually just generates a folder with your tests, not the surrounding project or configuration. In the spirit of making things easy, we have provided some "starter kits" to get you up to speed.
Click on the "Sample Tests" generate code button:
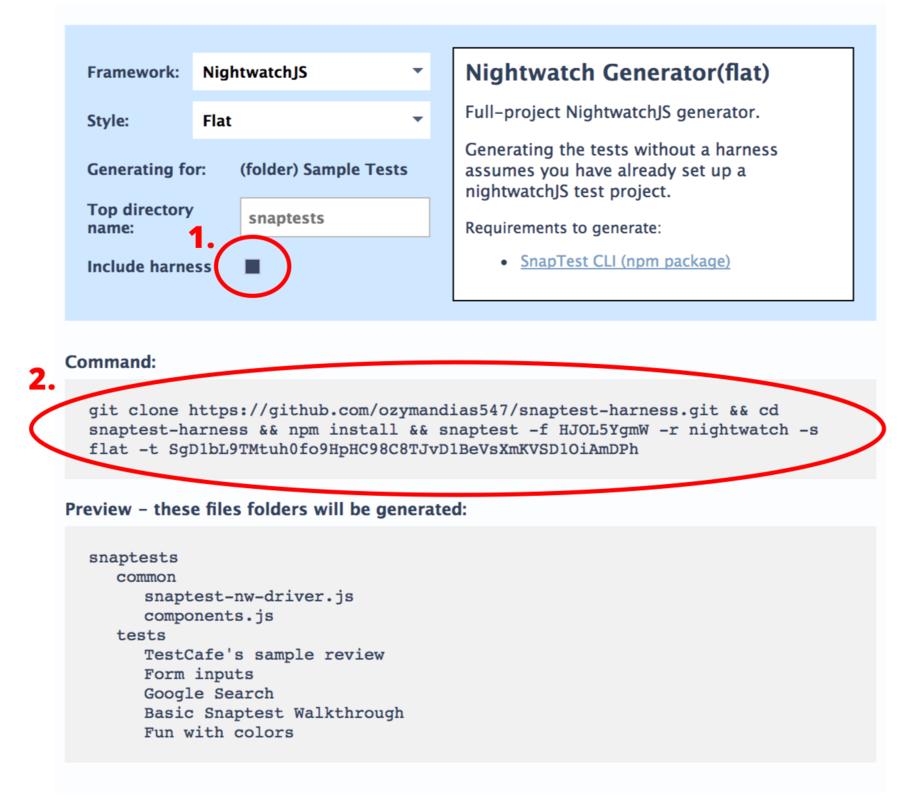
You will see:
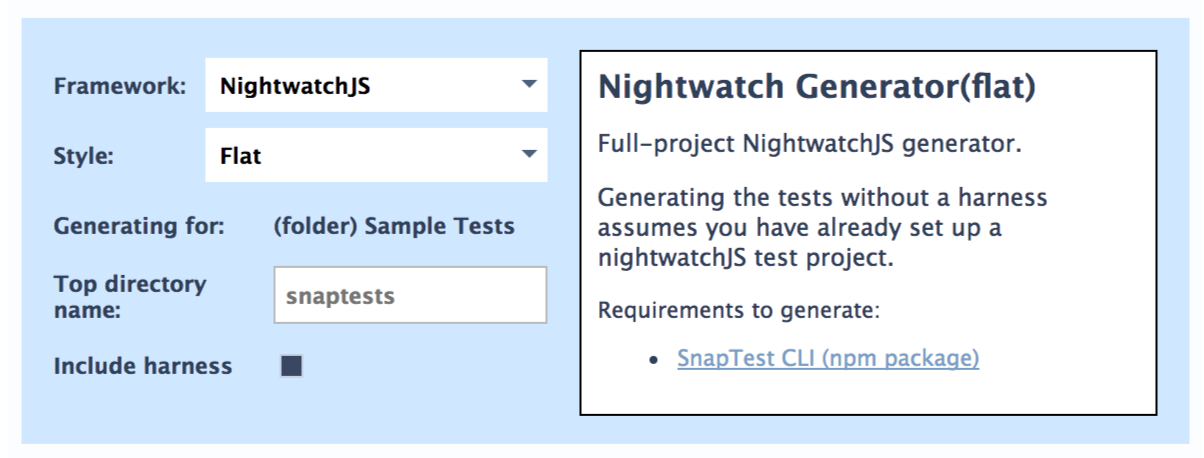
Each generator has usage instructions included on this screen. The options are:
- Framework: The main type of generation available. Will include various languages and frameworks within those languages.
- Style: The same framework will often have various types of generators with varying degrees of capabilities. For example, Chromeless has a Prototyper and a full-project generator.
- Generating for: A reminder of what is about to be generated. Can be a single test, folder, or entire account.
- Top directory name: The name of the test folder to be generated.
- Include harness: The "harness" refers to starter kit projects that can be included if you haven't setup a QA project yet.
Step 3: Generate the code on your local machine.
- Git
- Node v6.10.0+
- Chromedriver installed on your Path
- Java 8+ (since Selenium requires it)
- snaptest-cli
Configure the code generation as follows:
- Click the "Include harness" checkbox
- Copy and paste the command line into your terminal in a directory you'd like your QA project to exist.
If all went well, you'll have an entire new project generated locally. Finally, type npm test to run them. Please report any issues you face so we can handle them quickly.
nightwatch.json file by removing the test_workers fields. Step 4: Regenerate new tests changes.
The final step is to change a test in the SnapTest extension and regenerate the new code for it. Go ahead and add a new test or change an existing one within the "Sample Tests" folder.After finishing that, in order to regenerate you simply remove the "include harness" checkbox in the code generation options and copy/paste the new command into your terminal It will be much shorter because it doesn't include the starter kit "harness", and it will generate much faster. The new command should look something like this.
snaptest -f <YOUR_FOLDER_ID> -r nightwatch -s flat -t <YOUR API KEY>As your tests change or you add more, keep regenerating the tests.
What should I do next?
- (coming soon) How to best make use of generated code.